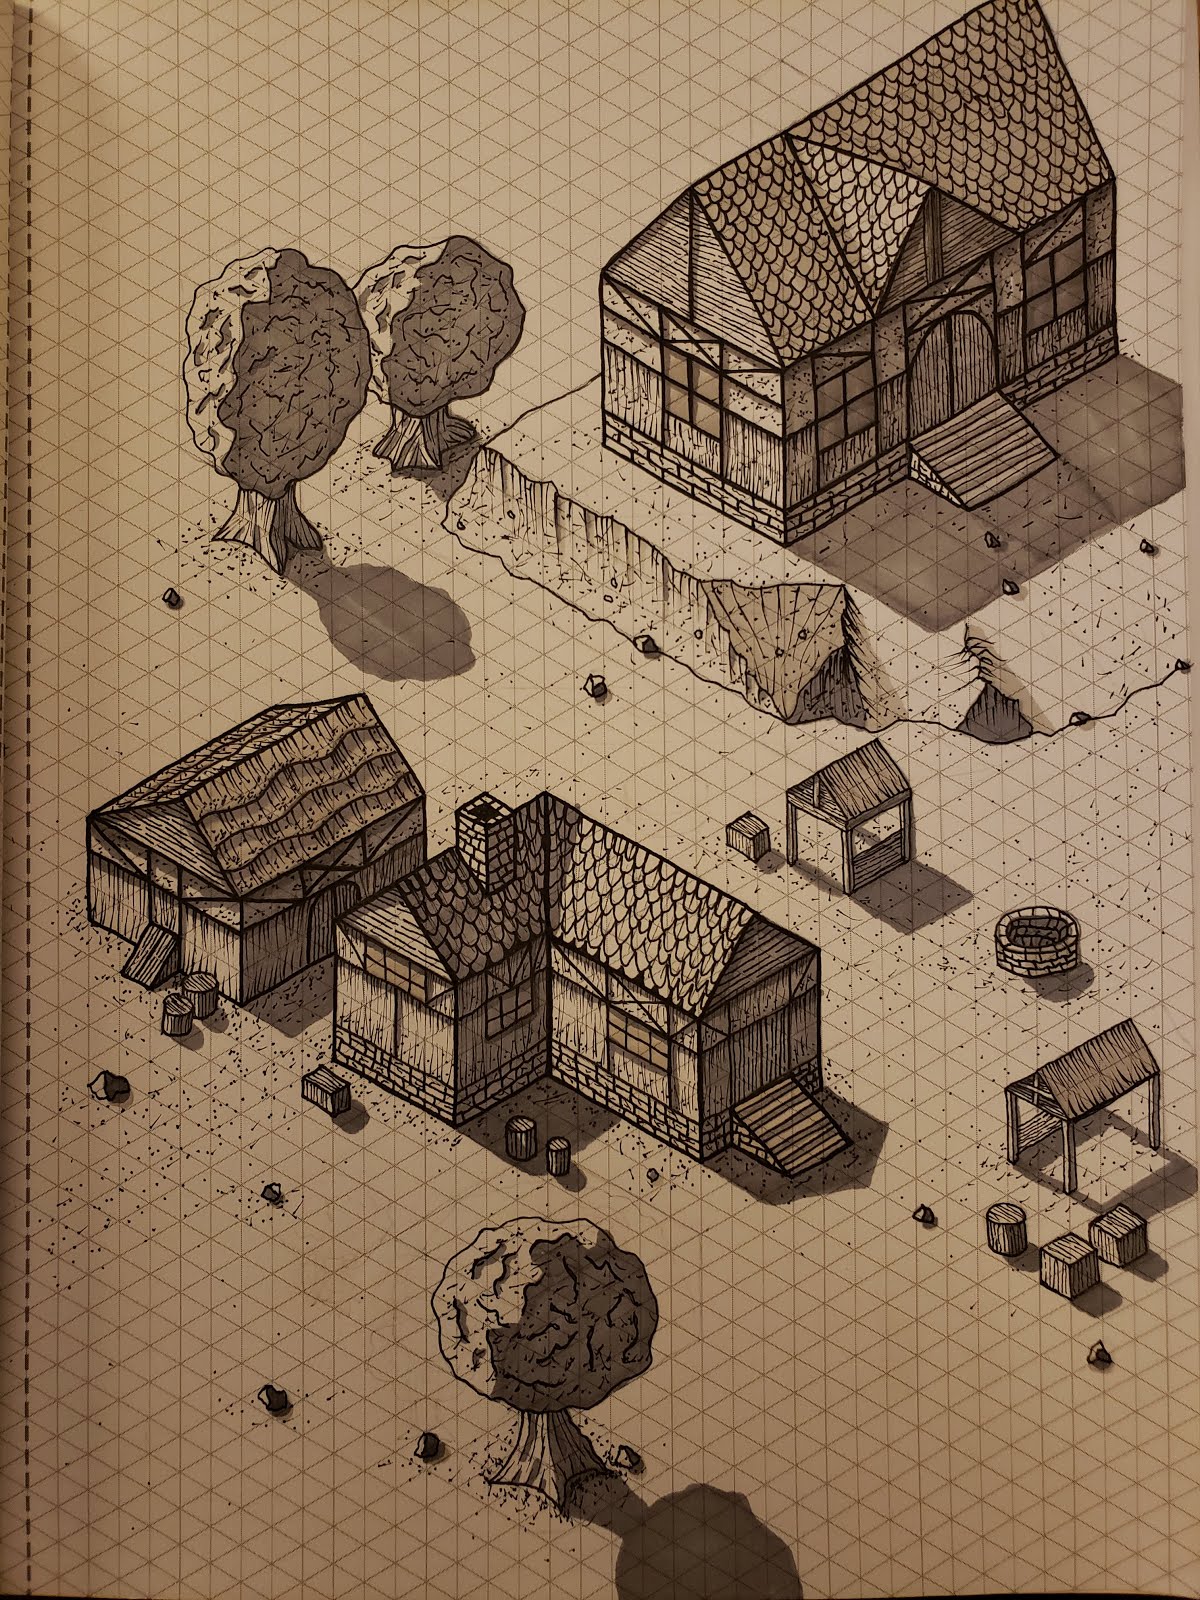
How to Draw an Isometric River

If you're going to draw impressive isometric villages then it is important to be able to draw lots of different types of things in order to give variation. In this blog post we'll look at how to draw an isometric river.
Supplies
We will need the 005 pen and Cool Grey 1-4 markers. All of these materials are available at the links above.
Step 1: Cliff and River Outline
Our example river will have a small cliff on the top side and will flow over a small waterfall. Go ahead and use the pencil to add these outlines. Notice the downward pencil marks on the cliffs help show the height of the cliff and they get shorter as they approach the end of the cliff. This represents the top of the cliff meeting the ground below. Make the pencil outline of the river random and wiggly.
Step 2: Rocks
Now break up the bottom of the cliffs and the edge of the river by drawing in some rocks. This will give some character to the river. Make the locations random, but not too evenly spread out. Have various clumps of multiple rocks and some areas with no rocks.

Step 3: Initial Pen Tracing
Use the .005 pen to trace the top of the cliffs and the rocks. Avoid tracing over the waterfall at the moment. Make the rocks random shapes and give them some dimension by drawing various flat faces on the rock with by drawing connected lines on the inside of the rock outline.

Step 4: Cliff Texture
Add in the cliff texture with the .005 pen, again avoiding the waterfall section. Press firmly at the top of the cliff and then "scratch" the paper in a quick motion to draw the line. This gives a tapered, spidery look to the cliff texture. The length of these texture lines should match the height of the cliff in that section.

Step 5: River Bank Texture
Now use the .005 pen to add in the river bank texture following the pencil lines. To do this follow the isometric grid lines in the direction that creates a cross section of the river. In our case that is the bottom left to top right directional lines. The river bank texture lines should be curved, creating a beveled look to the edge of the river. Use the same technique as the cliff texture to create tapered, spidery looking lines. You should add a ton of these texture lines such that the entire river bank is filled with them.

Step 6: Additional Texture
Now add random dots and scratches to the river bank and the bottom of the cliffs. This will give some additional texture to the river.

Step 7: River Shade Outline
Using the Cool Grey 2 marker, outline the river. Follow the bottom edge of the cliff and the inner part of the river bank texture, flowing the river outline around the rocks.

Step 9: River Shading and Texture
Now use the Cool Grey 1-3 markers on the river. Starting with Cool Grey 1 and proceeding upward in the marker color numbers, add wiggly lines starting from the beginning of the river section and proceeding towards the end of the river section. Notice the river has two sections, one above the water fall and one below. The river section below the waterfall begins one isometric line lower than the end of the top section. This represents the height of the waterfall.

Step 10: Waterfall Texture
Following the same techniques from before add the cliff texture to the water fall section. This probably could have been done in a previous step.

Step 11: Waterfall Shading
Using Cool Grey 3 and 4 markers provide random dots of shading to the water fall section until it is mostly shaded.

Step 12: Final Shading
Using the Cool Grey 4 marker add cliff shading the cliff facing the bottom right corner. Similarly add shading to the rocks. For the other cliff section, add thin lines of shading below the top of the cliff and on the right hand side of some of the more prominent cliff texture lines. I also added some texture to the ground around the cliffs and river banks using the same "dot and scratch" technique.

I hope you enjoyed this post. See my other How to Draw Isometric articles for more pop off the page isometric techniques.